+86 13738447669
Mar 04, 2024
How to Set Up and Fix an Inflatable Tent?


How to Set Up an Inflatable Tent?
 
  1. Preparation:

    • Choose a suitable location for your tent, ensuring it's flat and free from sharp objects.
    • Lay out all the components of your tent and make sure everything is present.

  2. Unpack the Tent:

    • Spread out the tent fabric on the ground, making sure it's positioned correctly.

  3. Inflate the Tent:

    • Locate the inflation valves on the tent.
    • Attach the pump to the valves according to the manufacturer's instructions.
    • Begin inflating the tent, typically starting with the main beams or tubes.
    • Inflate each beam until it's firm but not overinflated. Be careful not to overinflate, as it can strain the seams.

  4. Secure the Tent:

    • Once the tent is fully inflated, secure it to the ground using the pegs provided.
    • Insert the pegs through the loops or rings at the corners of the tent and hammer them into the ground at a slight angle.

  5. Stabilize the Tent:

    • If your tent has guy ropes, attach them to the appropriate points on the tent.
    • Peg out the guy ropes at an angle away from the tent to provide additional stability.
    • Adjust the tension of the guy ropes as needed to ensure the tent is secure and stable.

  6. Add Accessories:

    • If your tent has additional accessories such as a groundsheet or rainfly, attach them according to the manufacturer's instructions.
    • Make sure all zippers are closed and any vents or windows are properly secured.

  7. Inspect for Leaks:

    • After the tent is set up, check for any leaks in the inflatable beams.
    • Listen for escaping air or use a soapy water solution to identify any bubbles that may indicate leaks.
    • If you find any leaks, patch them according to the manufacturer's instructions.

  8. Final Checks:

    • Double-check that all components of the tent are properly secured and in place.
    • Ensure that the tent is stable and able to withstand any potential weather conditions.

  9. Enjoy Your Tent:

    • Once everything is set up and secure, you're ready to relax and enjoy your inflatable tent!

Always refer to the specific instructions provided by the manufacturer of your tent for the most accurate guidance on setting it up.

 
How to fix a leaky inflatable tent?


Fixing a leaky inflatable tent is usually a manageable task. Here's a step-by-step guide to help you:

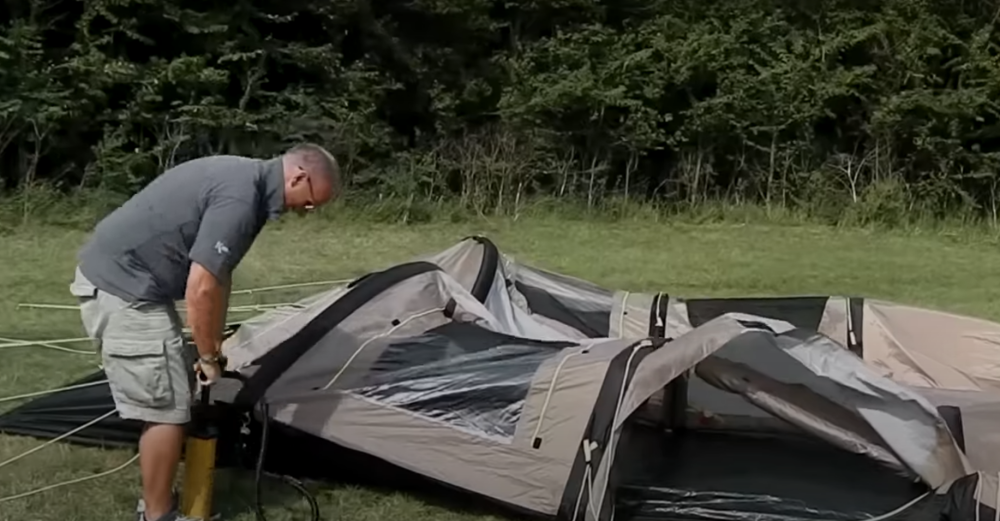
  1. Identify the Leak: Before you can fix the leak, you need to find it. Inflate the tent and listen for any hissing sounds of escaping air. You can also use a solution of water and dish soap to spray over the tent. Bubbles will form where there's a leak.

  2. Mark the Leak: Once you've identified the leak, mark its location with a marker or a piece of tape. This will make it easier to find when you're ready to repair it.

  3. Deflate the Tent: After marking the leak, carefully deflate the tent. Make sure it's completely empty of air before proceeding with the repair.

  4. Clean and Dry the Area: Use a clean cloth or paper towel to wipe down the area around the leak. It's important that the surface is clean and dry before you attempt to repair it.

  5. Apply Patch or Sealant: Depending on the type of leak and the materials your tent is made of, you can use various methods to fix it:

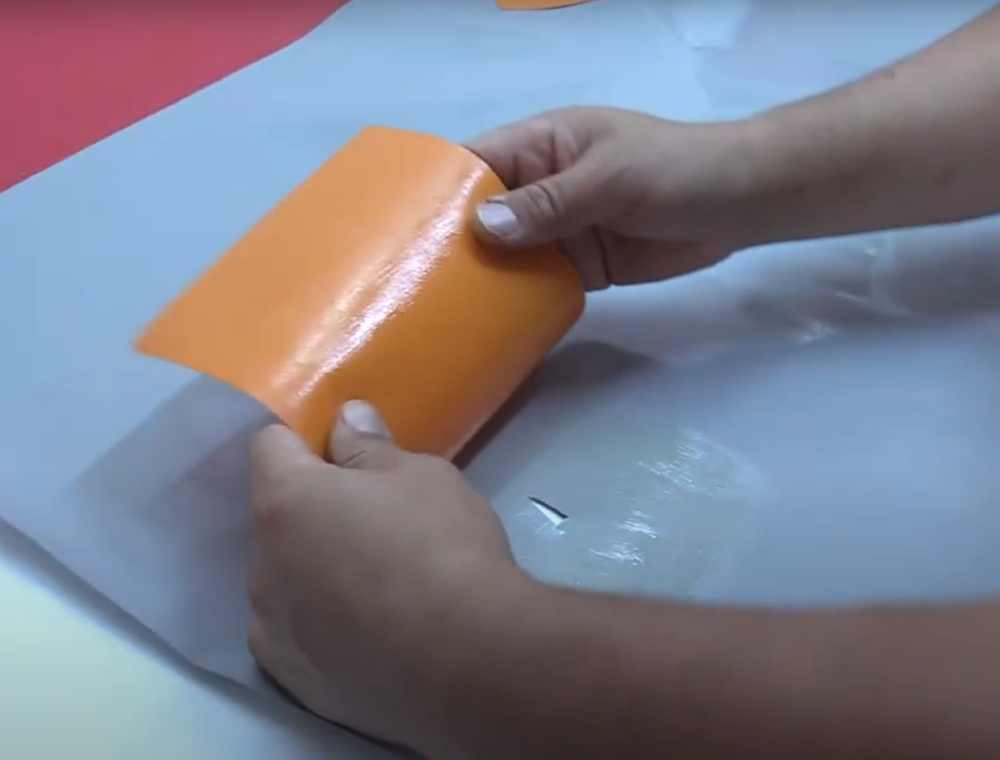
    • Patch Kit: Many inflatable tents come with a patch kit that includes adhesive patches. Cut a patch from the kit to cover the leaky area, ensuring it's slightly larger than the leak. Apply the adhesive according to the instructions provided with the patch kit, and firmly press the patch onto the leak.
    • Inflatable Repair Tape: Some tents come with repair tape specifically designed for inflatable materials. Cut a piece of the tape to cover the leak and apply it firmly over the damaged area.
    • Inflatable Sealant: There are sealants available that can be applied directly to the leaky area. Follow the instructions provided with the sealant for the best results.
  6. Allow Time to Cure: After applying the patch, tape, or sealant, allow it to cure according to the manufacturer's instructions. This typically involves letting it sit undisturbed for a certain amount of time to ensure a strong bond.

  7. Test the Repair: Once the patch, tape, or sealant has cured, inflate the tent again and check for any signs of leakage. If the repair holds and there are no more leaks, your inflatable tent should be good to go.

By following these steps, you should be able to fix a leaky inflatable tent and get back to enjoying your outdoor adventures with confidence.

 
KASSICO is a professional outdoor camping gear manufacturer in China with more than 10 years of experience, We specialize in high-end camping tents, glamping tents, car tents, sleeping gear, and other camping gear. We have cooperated with more than 300+ customers in EUROPE, the USA, AUSTRALIA, JAPAN, KOREA, etc. Our factory has passed BSCI & ISO9001. We have a strong design team, you can send us your design, we can customize your style, and OEM service is offered based on the customer's original sample or specification sheet. All the products must be through our QC strict inspection. Quality control is a process through which a business seeks to ensure that product quality is maintained or improved with either reduced or zero errors.

More Details: https://www.kassicotent.com/
 
Contact
Kassico is dedicated to providing superior service.
Welcome tocontact us with any questions or inquiries.